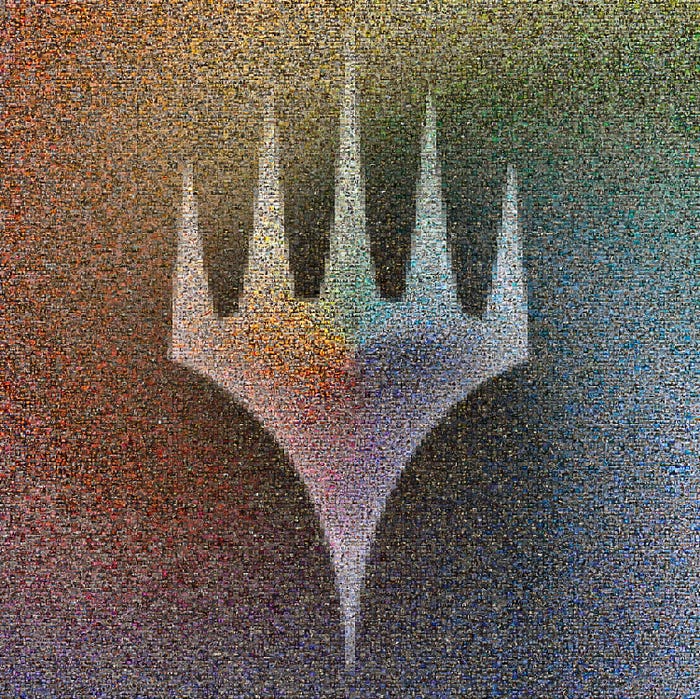
Creating a “Magic: the Gathering” Artwork Mosaic
I’ve been playing Magic: the Gathering since I was in middle school (back in the 90’s when the game was brand new). I’ve always loved the images used on the cards and wanted a way to display and appreciate all of the amazing artwork created throughout the game’s history. I also have a background in computer science and had an idea: what if I could write software to process the card art into a mosaic? The result exceeded my expectations, and in this post I’ll describe how I created this mosaic (download links available at the end of the post).

The Process
I had some overall objectives for creating a mosaic from card artwork:
- I should be able to choose any image as the target picture for the mosaic. Of course, some target pictures will produce better-looking mosaics than others.
- Each unique card image from Magic: the Gathering should be represented exactly once.
- None of the original card artwork should be manipulated to fit into the mosaic beyond cropping the artwork to fit the required aspect ratio (for example, no exposure or hue shifting).
I couldn’t find any off-the-shelf software that would meet these objectives, so I decided to write my own.
Gathering the Artwork
The first step to building the mosaic is downloading the source card artwork used for the individual tiles. Scryfall provides a wonderful API for getting the data about cards (names, sets, unique illustration identifier, and more) as well as images of the cards cropped to just the artwork. Certain categories of cards in Scryfall did not fit in well with the mosaic (for example, prototype cards that are hand-drawn on pieces of paper). To filter out these cards, any images from “funny”, “memorabilia”, or “token” sets are excluded. The card artwork set does include both faces of double-sided cards, as well as both halves of split cards with multiple images.
Understanding Color
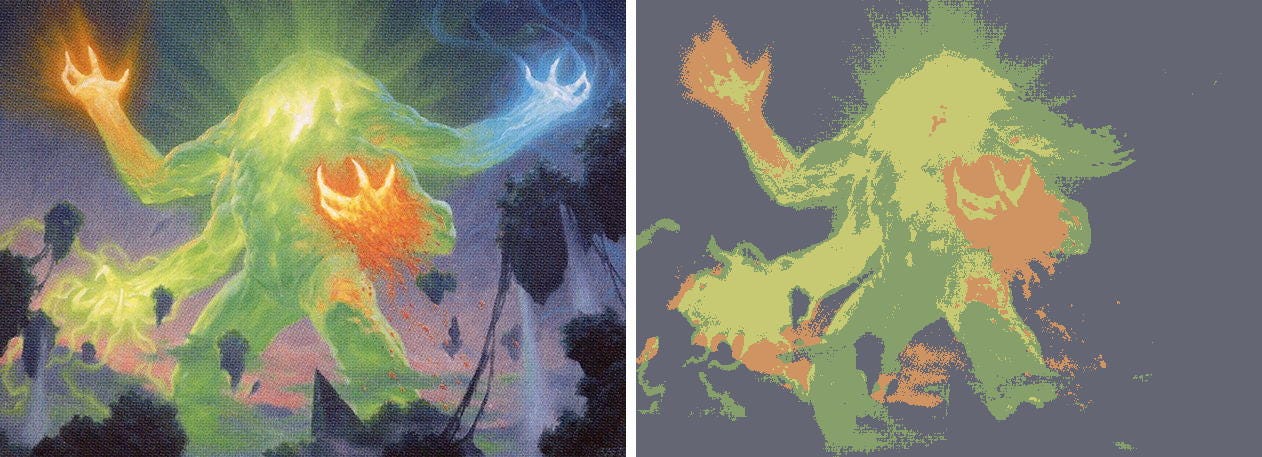
In order to build a mosaic, we need to discern the main colors in each piece of art. To do this, I used an algorithm called k-means clustering to reduce each image into its primary 4 colors. Here’s how the process works: to begin, we pick 4 random pixels from the image and color each bucket that color. Then we take every other pixel in the image and put it in the bucket that’s closest to its color. The colors in each bucket average together, and we paint each bucket its average color. Then we do the whole process again, placing the pixels based on the new bucket colors. We continue to keep re-averaging, re-painting, and re-assigning until either all of the colors end up in the same bucket as last time, or we decide the error is small enough to stop. Here’s an example of the 4-color reduction from printings of Counterspell and Omnath, Locus of Creation.

This algorithm requires us to know how close two colors to each other, which tells us which bucket to assign each pixel to. Since our primary interest is in the way humans view differences between colors, the CIELAB color space provides a great color representation since it’s designed around human color perception. By treating a color’s 3 CIELAB components as the coordinate of a point in space, we can use the standard distance formula to approximate the “closeness” of two colors. We can also average a group of colors by computing the average of the point representation of those colors.
Dividing the Target Picture into Tiles
Now that we understand what the primary colors are in each piece of art, how can we arrange those images into something that looks like an entirely different target picture? To do this, the target picture needs to first be broken down into the correct number of tiles. Each of these tiles will eventually be assigned one of the card images.
Because the target picture is rectangular, we know that the number of tiles will be a multiple of two numbers (columns and rows). We also know that each tile’s aspect ratio should be close to the aspect ratio on the cards themselves (so that we don’t have to crop out too much of the art). Since we want to use each picture exactly once, we need to find a result that ends up with exactly the right number of tiles. This requires introducing double-sized tiles in which a 2x2 block of the normal-sized tiles are merged into a single tile. For example, imagine that we have exactly 9,997 card images to place in our mosaic. To maintain the aspect ratio of the card artwork while fitting them into the target picture, we compute that the target picture should be broken into 100x100 tiles (which would accommodate 10,000 card images, more than we require). We can merge four of the 10,000 tiles into a double-sized tile, and then place 9,996 normal-sized tiles + 1 double-sized tile for the total of 9,997 tiles being filled.

Assigning Colors to Tiles
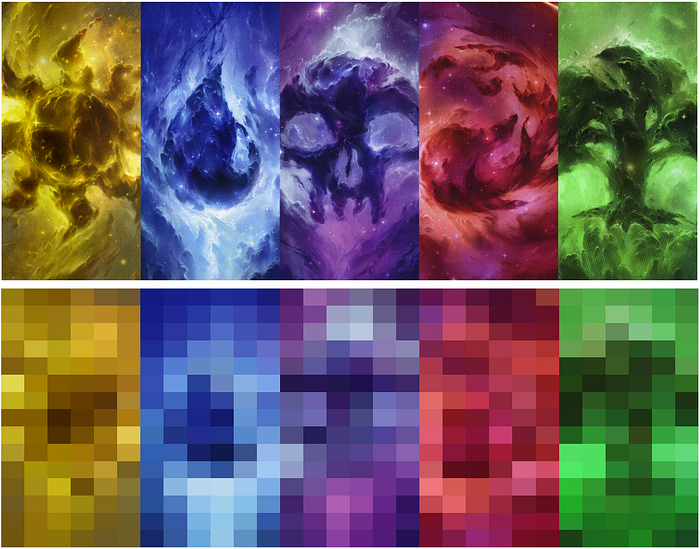
At this point, we know how many columns and rows the target picture is going to be broken into to create tiles, and how many of those tiles should be merged into a double-sized tile. The next step is to assign a color to each pre-merged tile, and then to determine which tiles should be merged into the double-sized tiles. Coloring the tiles follows a process similar to the bucket-filling step of the k-means clustering algorithm. Each pixel in the target picture is assigned to one of the tiles by determining which column and row the pixel falls into. Then each tile’s color is assigned by computing the CIELAB average color of the pixels assigned to the tile. After assigning a color to each pre-merged tile, the double-sized tiles are picked. For each of the double-sized tiles we need, we look at all of the remaining single-sized tiles that could still be merged, and find the cluster of 4 that have the closest total color distance from each other. This represents an area with low detail (because the colors are all very similar), so we’ll lose the least detail by merging these tiles into a double-sized tile. This is repeated until we have the number of double-sized tiles required. Below is an exaggerated example of reduction of the Theros Lands target picture into a 30 x 15 set of tiles.
Assigning Card Art to Tiles
Now that we understand the primary colors of each card and we know how many tiles our target picture is broken into and what color each of those tiles should be, the next step is to find a good way to arrange the artwork. This can be modeled as an optimization problem called the assignment problem that seeks to minimize the total “perceived color difference” between the card art and the tile it is being placed on (across the entire target picture). Using the terminology discussed in the Wikipedia article, the “agents” are the card artwork, the “tasks” are assignment to a tile in the mosaic, and the “cost” of assigning the task is the distance between the card art’s colors and the tile’s color. The goal is to minimize the cost, resulting in a mosaic where the card art matches well with the tile it’s assigned to.
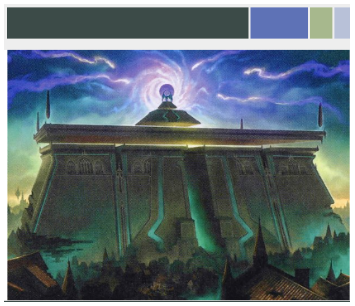
For comparing card artwork with tile color, we already have a useful way to classify the cost as a distance between two colors. Now we just need to compare the card artwork’s primary colors with the tile’s color to see how far away that card is from the tile’s desired color. Since the card artwork was broken down into 4 primary colors, each of those colors is weighted by the number of pixels in the image that ended up in its bucket. Then, the weight for each of the 4 colors is multiplied by its distance to the tile’s color. For example, the artwork for Bolas’s Citadel (below) is approximately 70% dark teal, 16% dark blue, 8% light green, and 6% light blue. When determining the color distance from a tile, the dark teal distance would account for 70% of the cost, the dark blue distance 16%, etc. This will result in a short weighted distance when comparing with a dark teal tile, since 70% of the art is dark teal, but a higher weighted distance comparing to a light green tile since only a small part of the image is light green.
Since there are a large number of card images and tiles (26,263 unique art images released through the end of 2020), the algorithm can’t come up with a globally optimal solution for assigning cards to tiles in a reasonable amount of time. Instead, a heuristic gets to a close approximation of an optimal solution.
Playing with Target Pictures
After writing the initial algorithm, I had some fun trying a number of different target pictures for creating a variety of mosaics. I learned some things about what worked well and what didn’t.
- Target pictures that have a color distribution that matches the overall card artwork’s color distribution work the best. Target pictures that, for example, are missing a color (no red) or have more of one color than is necessary (lots of blue but only a little yellow) will result in card artwork assigned to not-optimal tiles. This then starts to look less and less like the target picture.
- Target pictures where the detail is less important work much better than highly-detailed images.
- Gradients work better in target pictures than large areas of a flat single color, since the flat color naturally will end up not flat in the mosaic once it’s covered in card artwork.
Here are the resulting mosaics for two interesting target pictures.

Printing the Theros Lands Mosaic
The Theros land card artwork ended up as my favorite mosaic after trying numerous ideas. The subject is immediately recognizable to Magic players, and the wispy artwork maps well into a mosaic (where the detail doesn’t matter quite as much). The color distribution also works well, and cards gravitated toward one of the 5 primary colors. I decided I loved it enough to get it printed in 5 parts for display.
Before printing, I did one final pass in Photoshop to swap some of the images that stood out from a distance. The algorithm did over 99.9% of the work to place the images well, and I used some human perception to give the last 0.1% of polish to make something that looks amazing (23 swaps total).
Here’s the final result, printed on five separate 15" x 30" Gatorfoam boards.
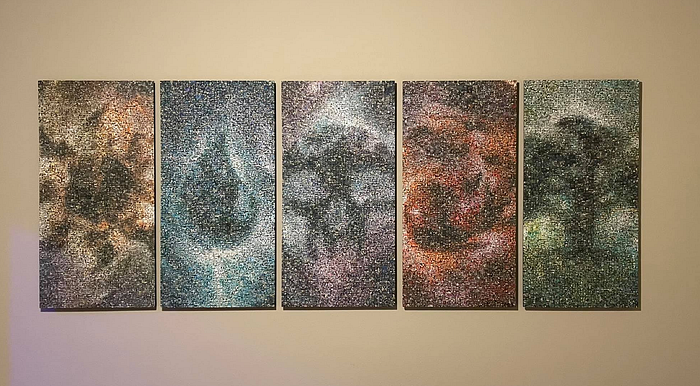
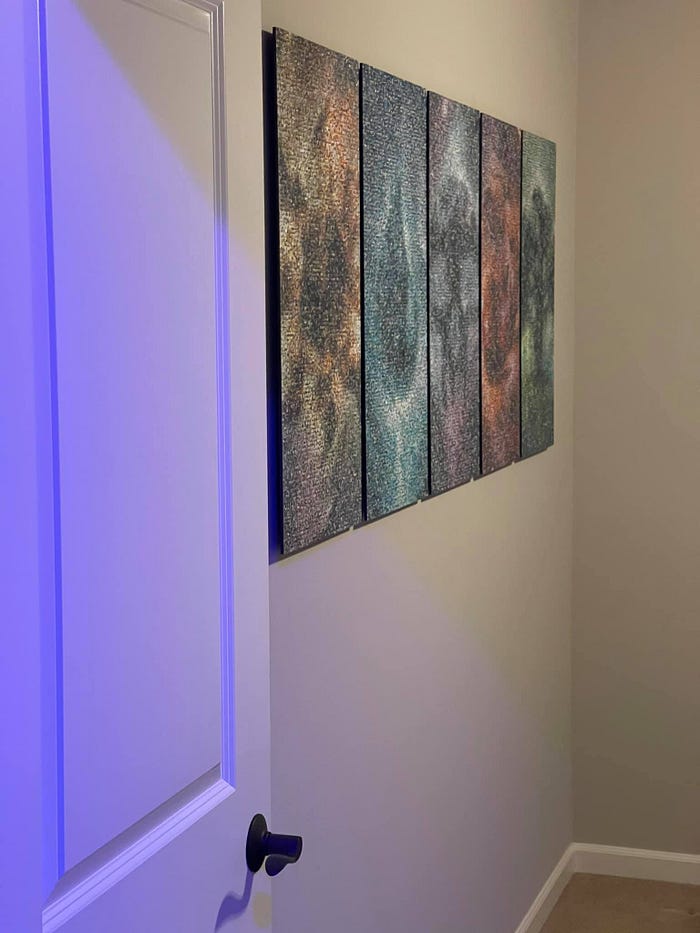
Image Downloads
I’ve made high-resolution images available to download. Each image is approximately 60MB at 11,484 x 22,990 pixels of resolution, which should be sufficient to print at quite large sizes.
Theros Lands Mosaic — Plains
Theros Lands Mosaic — Island
Theros Lands Mosaic — Swamp
Theros Lands Mosaic — Mountain
Theros Lands Mosaic — Forest
Disclaimer: the artwork presented here is unofficial Fan Content permitted under the Fan Content Policy. Not approved/endorsed by Wizards. Portions of the materials used are property of Wizards of the Coast. © Wizards of the Coast LLC.
